Turn Any Image into a PES Embroidery Design
October 20, 2025 | by IoT Development Company
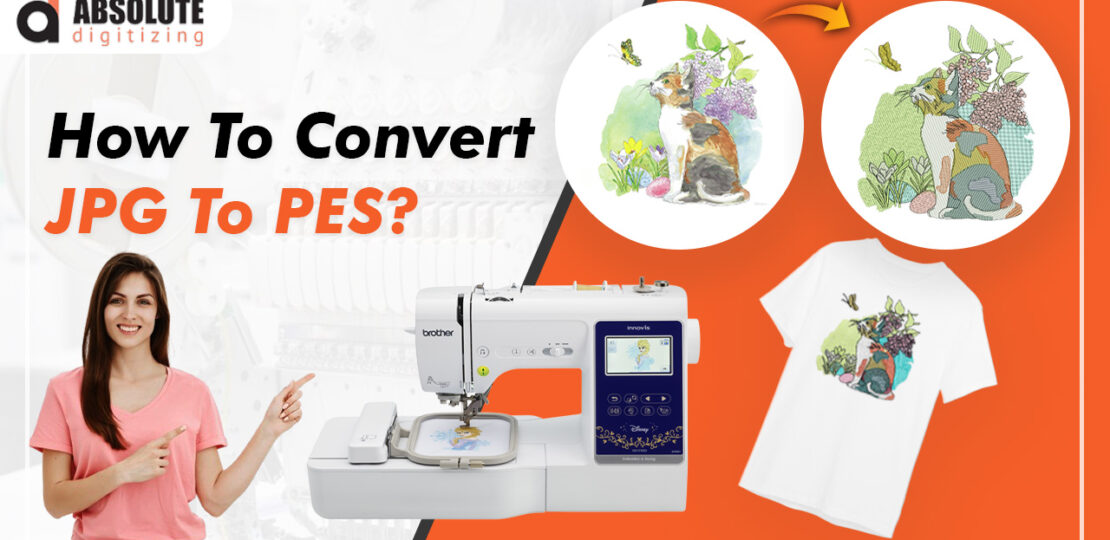
You have that perfect picture. It might be a beloved pet, a child’s drawing, or a stunning landscape. You look at it and think, “This would be incredible stitched onto a bag or a quilt.” But then reality sets in. Your Brother embroidery machine, which reads those handy PES files, can’t do anything with a JPEG or PNG. This is where a little bit of modern magic comes into play. The process of transforming that digital photo into a file your machine can understand is both an art and a science, and it all revolves around your ability to convert image to PES.
This journey from pixels to stitches is more accessible than you might think. While it requires some patience and a good eye, you don’t need to be a professional digitizer to get started. This guide will walk you through the steps, the tools, and the secrets to turning any image into an embroidery design you can be proud of.
Understanding the “PES” in Your Machine
Before we dive into the how, let’s quickly talk about the what. PES is a specific file format. It’s the language your Brother embroidery machine speaks. This file doesn’t just contain the picture; it holds a complex set of instructions—the stitch type, the stitch length, the needle penetration points, the color change order, and more. When you aim to convert an image to PES, you are essentially writing a very detailed recipe for your machine to follow, stitch by meticulous stitch.
Your Toolkit: Choosing the Right Software
You can’t create a PES file in Microsoft Paint. You need specialized software designed for embroidery digitizing. Your options generally fall into three categories:
First, there are auto-digitizing programs. These are often the starting point for beginners. You load your image, click a few buttons, and the software attempts to automatically create an embroidery file. It’s a great way to get quick results, but they often need refinement.
Second, there are semi-professional and professional-grade software platforms. Programs like BES Blue, Hatch, or Embrilliance offer you much more control. They have auto-features to help, but they also provide the tools to manually perfect every single stitch. This is where you can create truly professional results.
Finally, many Brother machines come with basic, entry-level software. It’s always worth checking what was included in your box, as it can be a perfect, no-cost way to dip your toes in.
The Golden Rule of Image Selection
Not every image is created equal when it comes to embroidery. The success of your entire project hinges on starting with the right picture. The best images for conversion have high contrast, clear lines, and minimal detail. A simple logo, a bold graphic, or a silhouette will give you a far better result than a busy family photo with subtle shadows and complex backgrounds.
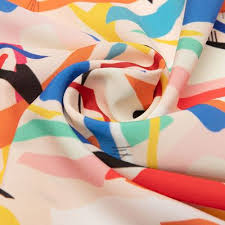
Look for images with distinct color blocks rather than smooth gradients. Embroidery uses solid thread colors, so a sunset that shifts from orange to pink will need to be simplified into two or three distinct color bands. Remember, you are creating a stylized interpretation, not a photorealistic copy.
The Step-by-Step Conversion Process
Let’s walk through the general workflow, whether you are using an auto-digitizer or a more advanced program.
Your first step is always to import your chosen image into the software. It will sit in the background as a guide. Next, you will use the software’s tools to trace or define the different areas of your design. In an auto-digitizer, this might involve clicking an “Auto-Trace” button and adjusting the sensitivity. In a manual program, you would carefully draw outlines around each shape.
Once the shapes are defined, you assign stitch types. Will this area be a Satin Stitch for a smooth, shiny border? Or a Fill Stitch for a larger, textured area? This is a critical creative decision. After that, you set the stitch direction. The angle of the stitches can add depth and texture to your design, making a fill area look like it’s woven or shaded.
A step that beginners often overlook is the underlay. This is a base layer of stitching that goes down before the top stitches. It stabilizes the fabric, prevents the top stitches from sinking in, and helps prevent puckering. Most software has automatic underlay settings, but learning to adjust them is key to professional results.
Finally, you sequence the color changes. The software will generate a list showing the order your machine will stitch the colors. You can rearrange this for efficiency, minimizing how many times you have to rethread the needle.
Testing and Refining Your Creation
Your first exported PES file is a prototype, not a final product. The most important rule in embroidery digitizing is to always do a test stitch-out on a scrap piece of fabric similar to your final project.
Watch the machine as it runs. Take notes. Are there too many jumps? Is the thread breaking in dense areas? Is the fabric puckering? This physical test is your best teacher. It shows you exactly what you need to adjust back in the software. Common fixes include reducing stitch density to prevent puckering, adding more underlay for stability, or simplifying areas with too much detail.
Troubleshooting Common Conversion Hiccups
You will run into issues, and that is part of the learning process. If your design looks messy and the outlines are not crisp, your original image was likely too complex or low-contrast. Go back and find a simpler image or edit your current one to increase contrast and sharpen edges.
If the fabric puckers, the stitch density is almost certainly too high. Your machine is putting too many stitches in one area, causing the fabric to gather. Reduce the density settings in your fill stitches.
If the thread breaks frequently, check for very small details. Tiny areas with high density can be tough on thread. Consider enlarging your design slightly or removing those minute elements altogether.
Unlocking Your Creative Potential
Learning to convert image to PES is like learning a new superpower for your embroidery machine. It transforms it from a tool that uses pre-made designs into a platform for unlimited personal expression. You can now immortalize a favorite flower, a company logo, or a simple sketch in thread.
Start simple. A basic, two-color shape is the perfect first project. With each success, your confidence will grow, and you can gradually tackle more complex images. Embrace the test stitches, learn from the little mistakes, and enjoy the incredible satisfaction of seeing a personal photograph come to life, stitch by beautiful stitch, directly from your machine. The digital world is now your embroidery hoop.
RELATED POSTS
View all
Apple iPhone 14 Pro Max in UAE – Pricing, Features, and Where to Buy
October 24, 2025 | by IoT Development Company
Toronto Junk Car – Best Way to Get Cash for Your Old Vehicle
October 22, 2025 | by IoT Development Company